

Skip the knives this Halloween in favor of super easy, carve-free pumpkin ideas (they’re little-kid-friendly!).

Metallic Trio Pumpkin
What you need:
1 medium tiger stripe pumpkin with twisty stalk
3 metallic-colored paints in rose gold, silver + gold
Metallic glitter
How to make:
The trick is to start at the base of the pumpkin and work up. Using masking tape, mark the halfway point all the way around the pumpkin. Apply the rose gold paint from the base up to the tape. Allow to dry. Paint a second coat and dry (if needed) then remove the tape. Paint the top of the pumpkin with silver. The drippy effect was an accident but we loved it so much we left it there. Lastly, paint the stalk with a thin layer of gold so the veins show through and for added sparkle, dust some glitter on the stalk while the paint is still wet.
Caution: do not use oil-based, or spray paints on pumpkins as they can cause the pumpkins to explode.
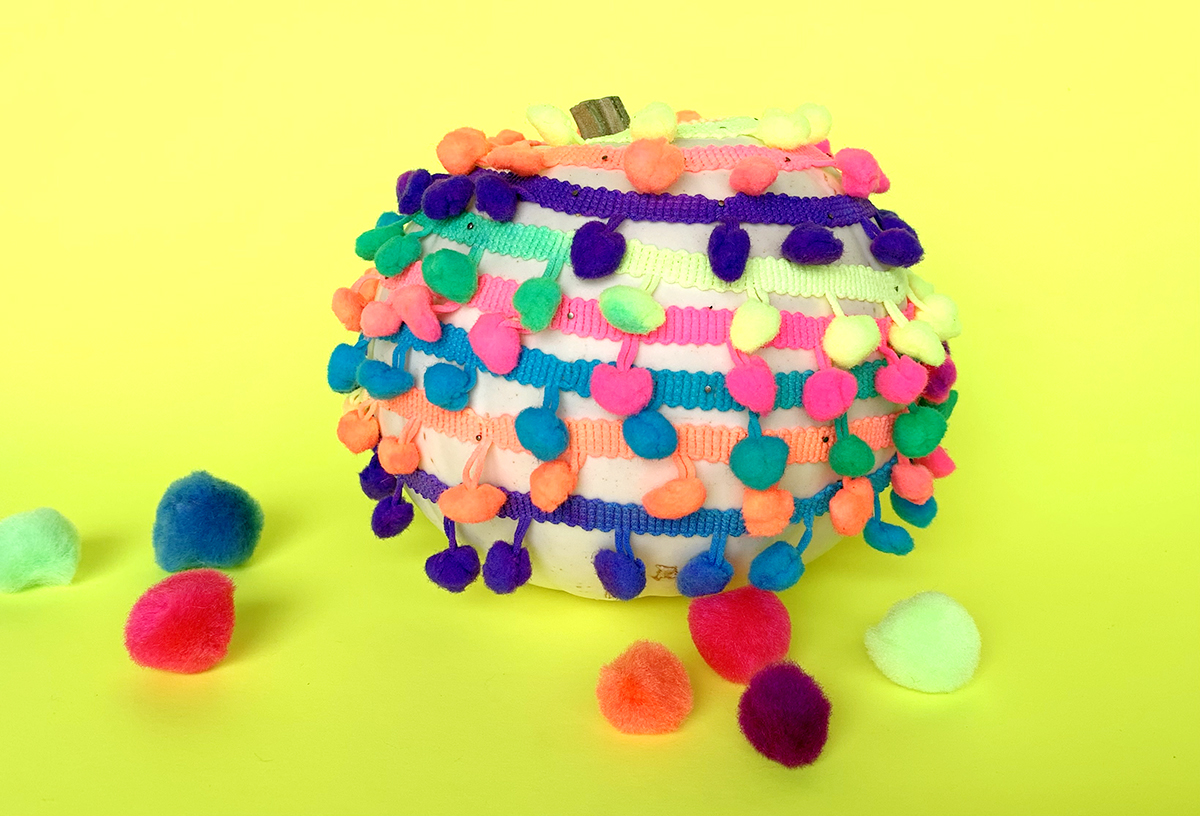
Pompom Neon Burst Pumpkin
What you need:
1 medium white pumpkin
3 yards of pompom trim
Hot glue or dressmaker’s pins
How to make:
Starting at the base of the pumpkin, use glue or dressmaker pins to attach the pompom trim in a winding, spiral motion until you reach the stalk at the top.
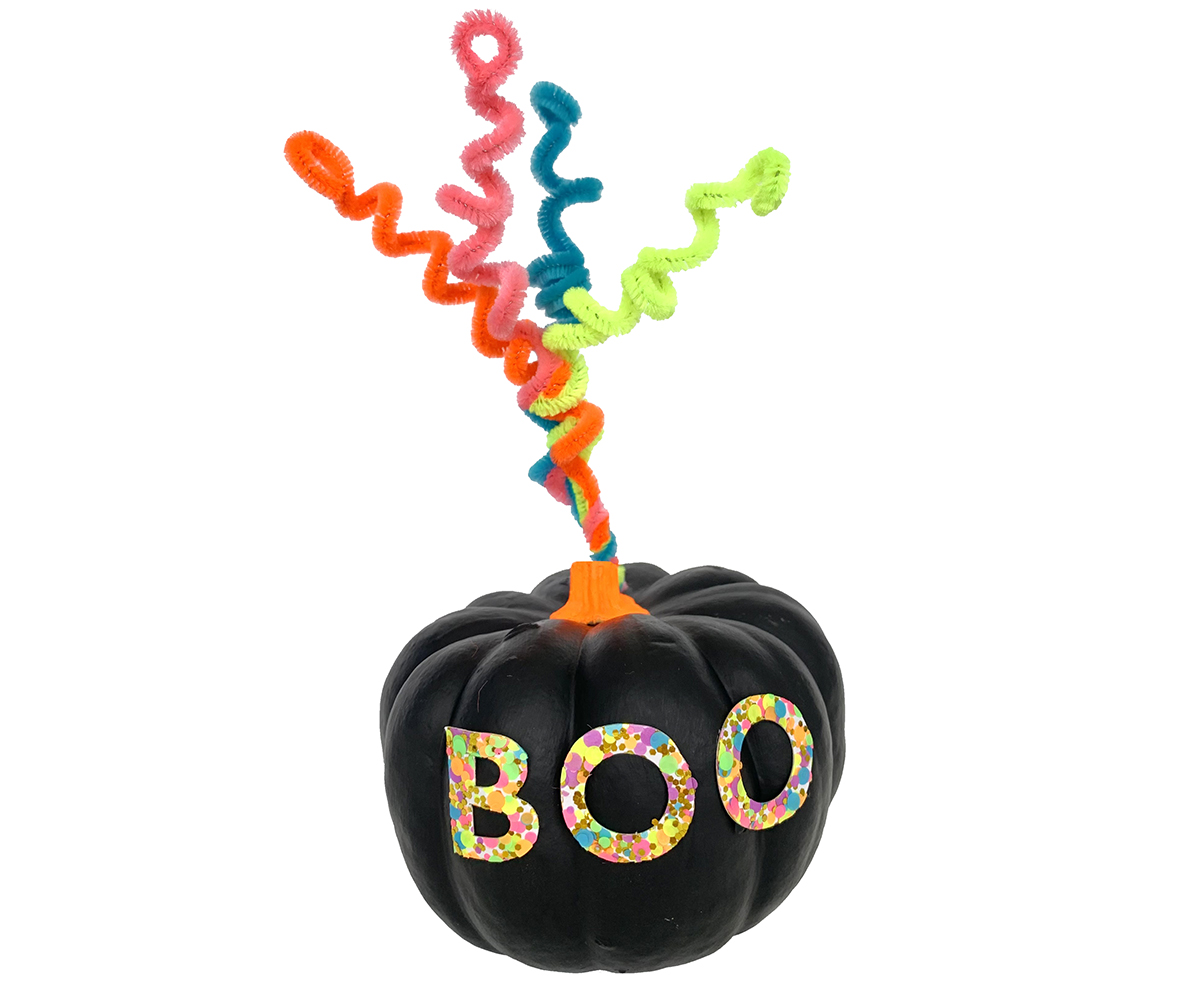
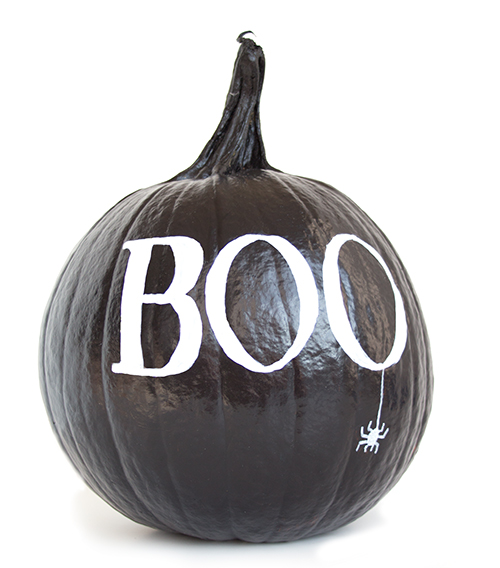
Swizzle Sticks ‘n’ BOO Pumpkin
What you need:
1 small pumpkin
Black and orange craft acrylic paints
Sticky-back letters
4 colorful pipe cleaners
Pencil
How to make:
Paint the entire pumpkin black and the stalk orange. Allow to dry. (May require a second coat). Peel and stick funky letters to say “BOO” in the center of the pumpkin. One at a time, wrap each pipe cleaner around a pencil, then pull the pencil free to create the twirly, spiral effect. Twist all four pipe cleaners together at the bottom of the sticks to form a stem. Poke a hole with the pencil in the top of the pumpkin on the opposite side of the stalk to the letters, and insert the pipe cleaner stem into the hole.

Creepy Crawlers
Cut four black pipe cleaners in half and attach them to the sides of your mini pumpkin. Make the eight legs by poking them gently into the pumpkin flesh. Add your choice of googly eyes plus antennae (and eyebrows!) with craft glue.
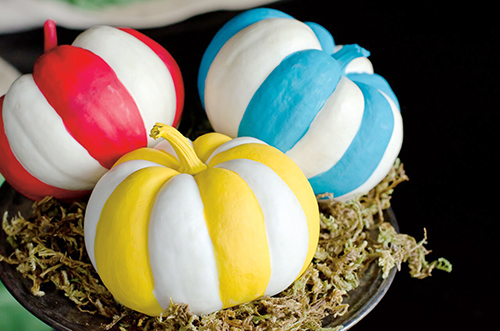
Stripe It Up
Alternate colors as you cover the sections of the pumpkin with acrylic paint. Don’t forget the stem, too.
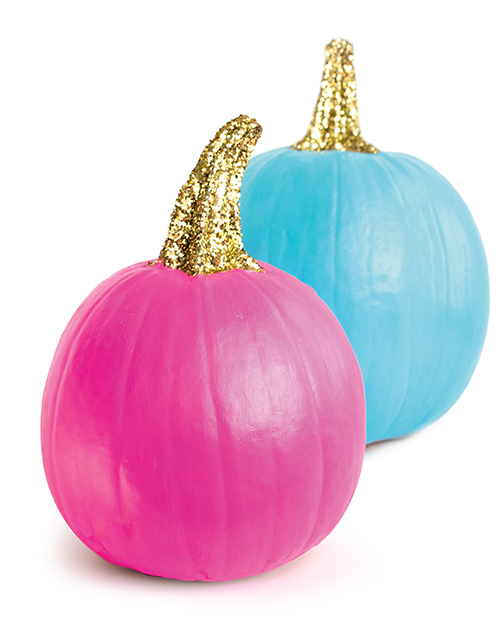
Shine Bright
Start with a long-stemmed pumpkin and paint the its body a single color of acrylic paint. Let it dry. Coat the stem with craft glue, then roll it in metallic glitter.
Write Away
How pretty is this carve-free pumpkin? Coat a pumpkin (including the stem) with a few layers of chalkboard paint and let it dry completely. Add words or designs with sidewalk chalk or a chalk pen.
-
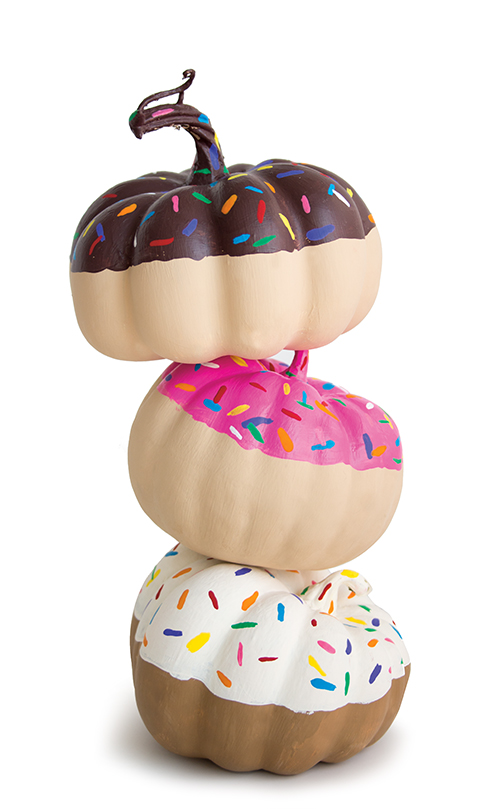
Staff Photo Mini Donut
Cover the top half of your mini pumpkin with pink, white or brown acrylic paint. Let it dry. Use a small brush to add in rainbow sprinkles.
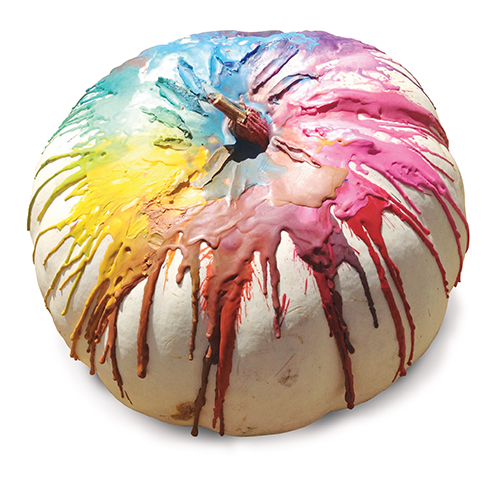
Melted Masterpiece
Start with a white pumpkin (either real or fake) and attach 16 unwrapped crayons in a spiral around the stem using tacky glue. After the glue is completely dry, use a hair dryer
to melt the wax into colorful ribbons.
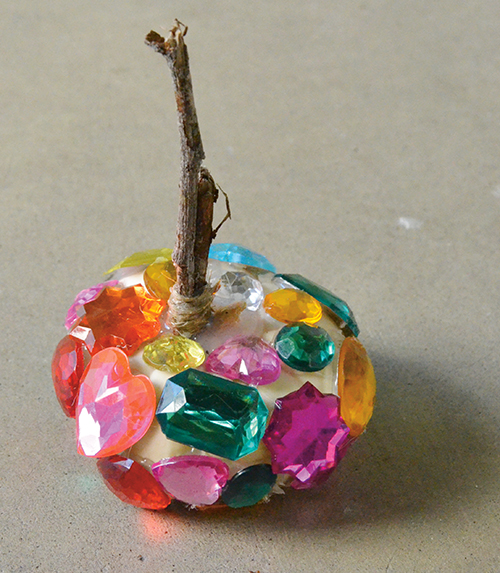
Glittery Gourd
What you need:
2 twigs
twine
low-heat hot glue gun and glue sticks
1 small pumpkin, stem snapped off
acrylic gems from the craft store
How to make:
1. Put 2 twigs side-by-side and wrap twine around the bottom inch to attach together. Use a dab of hot glue to secure.
2. Glue the twig bundle to the spot on the pumpkin where the stem was. Hold sticks in place until glue hardens.
3. Glue gems all over the pumpkin, leaving the base bare so it sits flat.

 of pumpkin carving with these 14 no carve pumpkin ideas|Skip the stress (and mess!) of pumpkin carving with these 14 no carve pumpkin ideas)